
 Welcome, Guest. Please
  May 02, 2024, 04:32:45 AM
1
Gearing Up and Rigging Up / First mods to my Phoenix 140
« on: September 24, 2007, 11:50:04 AM »
This post is probably most valuable to newbies like myself. (pretty basic stuff for most of you vets out there)
I recently added a couple paddle keepers and replaced the oem 5" hatch with a 5" bag holder hatch.
Here is my simple write up:
First pic shows most of the materials used except my drill/bit and liquid dish soap. I bought the paddle holder kit from captdick.net, Beckson hatch from the mfct. and the other odds and ends from my local box h/w store. (rivet kit I bought online)
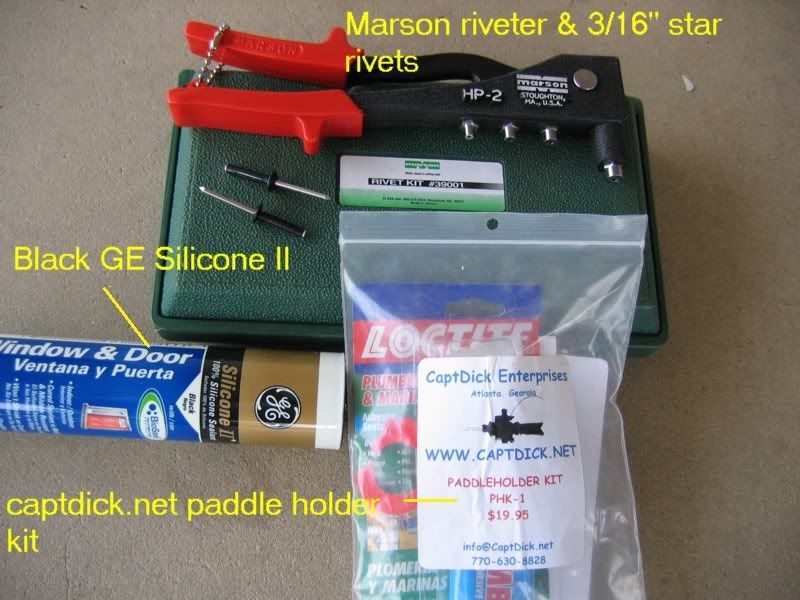
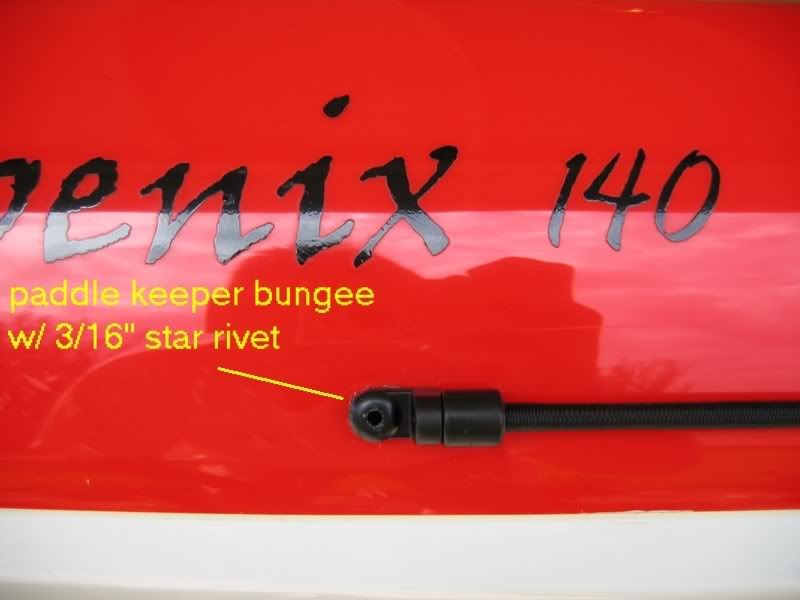
The paddle kit comes with all hardware needed (star rivets, bungee and clips) I followed the simple directions with my preference to install the clip under the middle carry handles. The distance is about 28" between the ends of the bungee and the center clip is about 3 1/2" above the horizontal bungee. The directions wanted you to install the main bungee 4-5 inches below the center hook, but in my case it was too low for my liking. There is plenty of tension holding the paddle the way I did it. It was a very simple operation. Drill the 3/16" holes, fill with marine grade silicone adhesive, coat area around the clip(s) with the liquid soap (for ease of cleanup) and rivet...
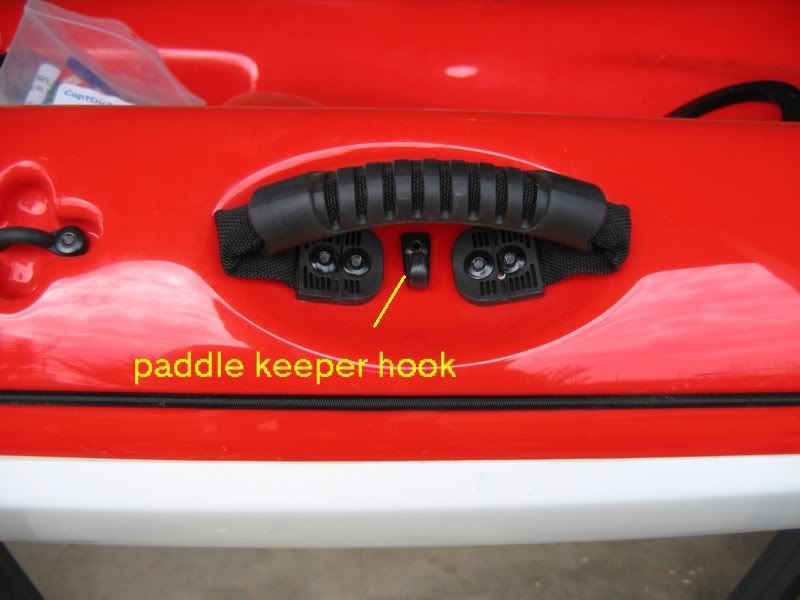
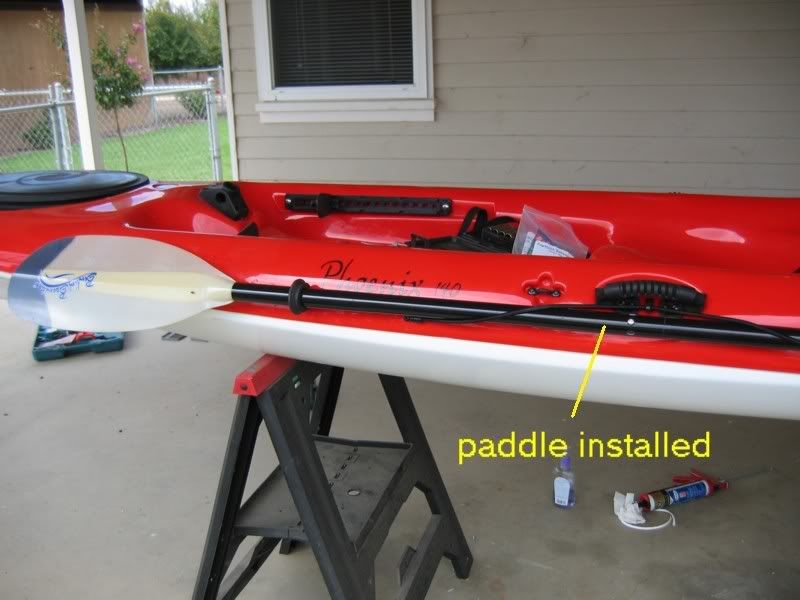
here is the result:
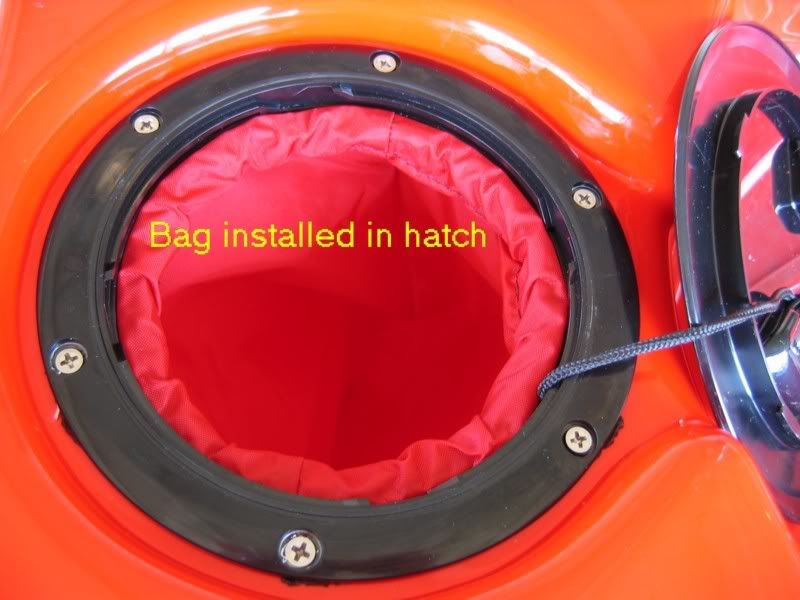
The hatch replacement was also fairly straightforward. The bag replacement makes the rear hatch much more functional IMO and you can still remove it if the need arises.
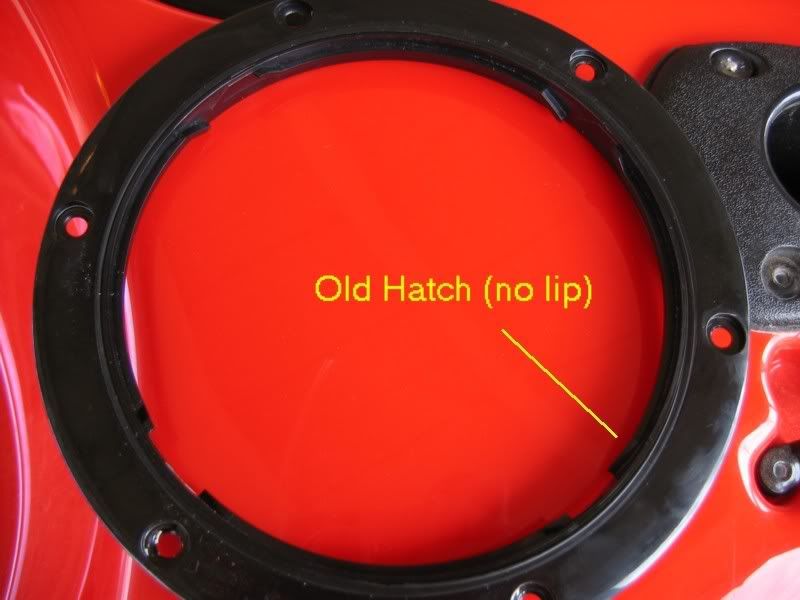
Old hatch removed-
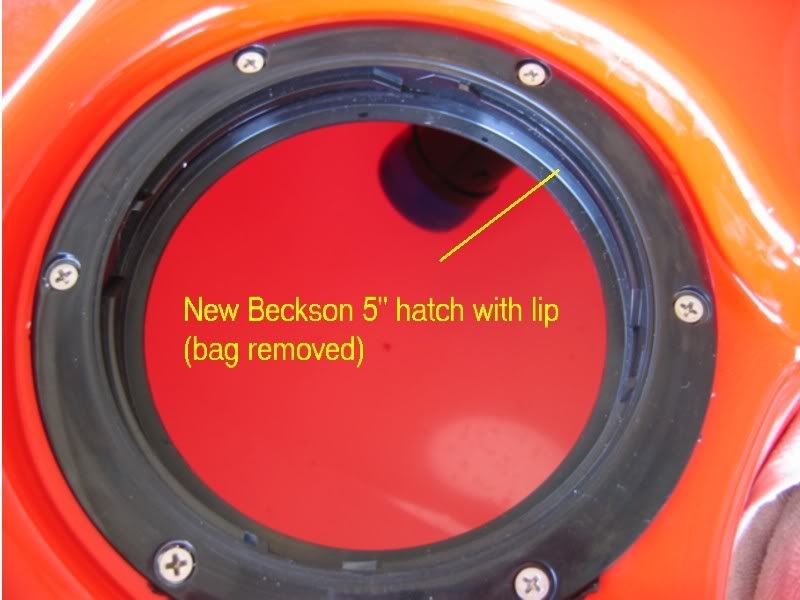
I put down a bead of GE Silicone II black caulk and installed the new hatch. The new hatch is nearly identical to the old with the exception of a "lip" that the inner hoop of the bag rests on / snaps into. I used the black caulk on recommendation from the Beckson tech. I don't know if it was imperative. (when I removed the original hatch the caulk was white) The most important tip the Beckson rep gave me was using the dish soap around the areas that I didn't want caulk.... Made cleanup a breeze.
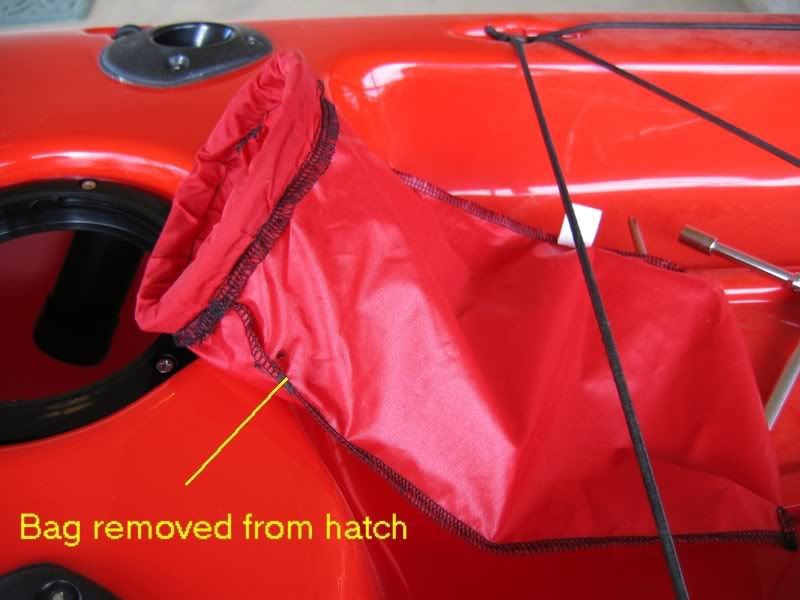
pic of the bag: I might shorten it as it does rest on the kayak bottom.
Lastly the finished product:
Special thanks to islandspeed2001 from jaxkayakfishing.com for his help in sourcing and his original post on rigging his phoenix 130.
I recently added a couple paddle keepers and replaced the oem 5" hatch with a 5" bag holder hatch.
Here is my simple write up:
First pic shows most of the materials used except my drill/bit and liquid dish soap. I bought the paddle holder kit from captdick.net, Beckson hatch from the mfct. and the other odds and ends from my local box h/w store. (rivet kit I bought online)
The paddle kit comes with all hardware needed (star rivets, bungee and clips) I followed the simple directions with my preference to install the clip under the middle carry handles. The distance is about 28" between the ends of the bungee and the center clip is about 3 1/2" above the horizontal bungee. The directions wanted you to install the main bungee 4-5 inches below the center hook, but in my case it was too low for my liking. There is plenty of tension holding the paddle the way I did it. It was a very simple operation. Drill the 3/16" holes, fill with marine grade silicone adhesive, coat area around the clip(s) with the liquid soap (for ease of cleanup) and rivet...
here is the result:
The hatch replacement was also fairly straightforward. The bag replacement makes the rear hatch much more functional IMO and you can still remove it if the need arises.
Old hatch removed-
I put down a bead of GE Silicone II black caulk and installed the new hatch. The new hatch is nearly identical to the old with the exception of a "lip" that the inner hoop of the bag rests on / snaps into. I used the black caulk on recommendation from the Beckson tech. I don't know if it was imperative. (when I removed the original hatch the caulk was white) The most important tip the Beckson rep gave me was using the dish soap around the areas that I didn't want caulk.... Made cleanup a breeze.
pic of the bag: I might shorten it as it does rest on the kayak bottom.
Lastly the finished product:
Special thanks to islandspeed2001 from jaxkayakfishing.com for his help in sourcing and his original post on rigging his phoenix 130.